23.3.12

Black Cherry Cheese Cupcakes (eggless)


This is the eggless and unbaked version of the Cheese cake. Very easy to make and trouble free. This is Nigella Lawson's recipe and as always, you cant go wrong with that. The original recipe is here


Digestive Biscuit: 125 gm
Butter: 75 gm at room temp
Cream Cheese: 300 gm
Icing sugar: 60 gm
Vanilla extract: 1 tsp
Lemon Juice: 1/2 tsp
Double Cream/Heavy cream/Whipping Cream: 250 ml
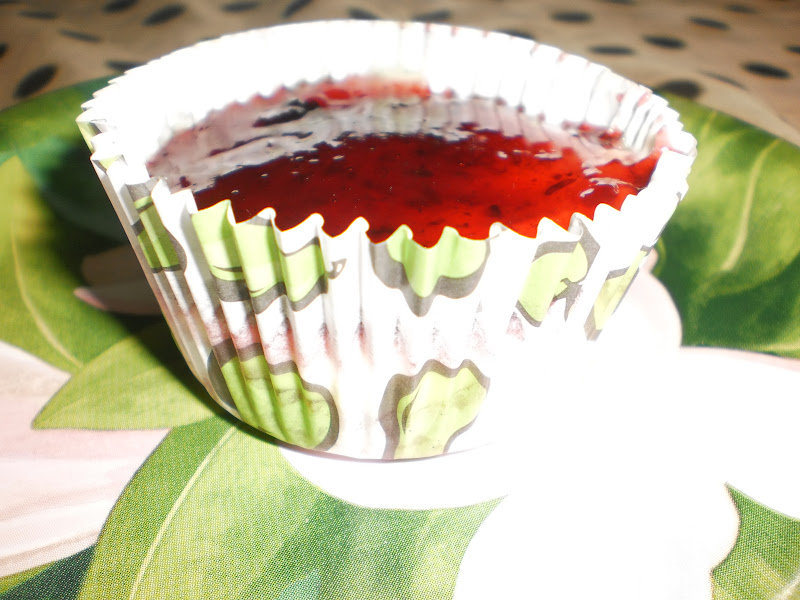
Black Cherry preserve: 300 gm


Dump the biscuits into the food processor and work it till you get crumbs.
Add the butter to it and whiz to make the mixture clump
Line your muffin pan with cupcake liners
Press this biscuit base into each liner and keep aside.
Beat together cream cheese, Icing sugar, Vanilla and lemon juice in a bowl till smooth
Now lightly whip the double cream/whipping cream and fold it into the mixture
(dont overdo this as the butter might separate)
Spoon the cheese cake filling on top of the biscuit base and smooth with a spatula.
Refrigerate till set.

That's my hubby helping out with the topping :)


When it is ready to be served, warm the preserve for 30 secs in the microwave and spread it on the cheese cake.
Indulge.


22.3.12

Eggless vanilla cake (butterless too)


This is one of the simplest cake Ive ever made which tasted excellent too, considering the fact it neither used egg nor butter. I call it simple coz I didnt even have to take out my stand mixer, I did the whole mixing with a spoon!!!!! 

Iam not kidding when I say its not even half an hour since I baked the cake and my kids have already finished half the cake (and they didn't even realize theres no egg in the cake!!!.. yes its a victory coz they are die-hard egg fans)

I first saw this recipe at my mom-in-law's place while I was going through her recipe collection. One book which caught my attention was Nita Mehta's cook book which did have a lot of eggless cake recipes and microwave cake recipes and 4 minute cake recipes. My Mom in law usually follows the English recipes for cakes, especially the Pound cake but I guess after buying Nita Mehta's books, she started baking these simple cakes once in a while (but for Christmas and Easter, it is always the English recipes!!!!)
Well, I read and did forget about it till I saw a lot of Blogger friends making this and posting the recipe. So I thought, Well, I too shall try and well, I wasnt at all disappointed. It was SUPERB (no eggs, no butter..moist and delicious!!!!)


All Purpose Flour: 1 1/2 cups
Sugar: 1 cup (You can either powder it or use the granulated one, I was too lazy to powder it this time, it worked fine)
Baking Powder: 1 1/2 tsp
Thick Curd: 1 cup
Vegetable Oil: 1/2 cup
Vanilla Essence: 1 tsp
Milk: 1 tbsp

Preheat your oven to 200C
Grease and flour a loaf pan.
In a bowl, mix the sugar and curd till sugar is completely dissolved
Sieve the maida with the baking powder twice.
Now to the curd sugar mix, add the vanilla essence and oil and mix it properly.
To this add the maida and fold in gently.
Transfer the batter in to the prepared pan.
Bake at 200C for 10 minutes
Then reduce the temperature to 180C
After 25-30 minutes, take the pan out and with the help of a pastry brush, apply milk on top.
(this is done for the browned and glazed top)
Bake till done. It took another 10 minutes in my oven. Oven temperatures vary so keep an eye.
Let it cool for 15 minutes.
Turn it over on a plate and once fully cooled, slice it and enjoy!!!

The original recipe used 1 1/4 tsp baking powder and 1/2 tsp baking soda which was mixed into the curd mix and left for a few minutes to form bubbles. I omitted the step and used 1 1/2 tsp baking powder and it worked fine too.


11.3.12

CheruPayar Payasam N Parippu Pradhaman


CheruPayar Payasam

Parippu Pradhaman


Yet another Classic dessert and I love this like crazy. This is another one of my mom's speciality and this is how she makes it. I was going to key in the Parippu Pradhaman recipe when I suddenly remembered I had the green gram payasam pictures somewhere in my draft, so finally I thought I will do it in one post coz  its made the same way, and ofcourse both are the same, just that one is the split and skinless version of the whole... :)


Split Green Gram/Moong Dal/CheruPayar Parippu: 1 cup (250 ml cup)
For Cherupayar Payasam, use Whole Green gram/Cherupayar instead of the dal
Water: 3 cups
Jaggerry: 400 gm
Water: 1 cup
Ghee: 2 tbsp
Thin Coconut milk: 3 cups
Semi Thick Coconut milk: 2 cups
Thick Coconut Milk: 1 cup
Cardamom Powder: 1 tsp

To Garnish
Cashewnuts: 10
Ghee: 1 tbsp

Dry roast the Moong dal for a few minutes (about 4-5 minutes) on medium flame till it gets a shade darker.
Let it cool, wash properly.
In case of Green gram/Cherupayar, wash properly and cook till just done.
Add the washed dal, 2.5 cups of water and cook on high heat for 2 whistles.
(if you want the dal to be mashed properly, cook for 2 more whistles, but I like it just cooked so that I can see it as it is in the Payasam.. but make sure it is cooked.. :0)
Now Boil the jaggerry and 1 cup water till it is melted properly.
Once cool, strain.
Now in a thick bottomed vessel, mix the cooked dal/green gram and the melted jaggerry and cook till it almost dries up like in the picture below.
At this point, add 2 tbsp ghee and mix properly.


Now add the thin coconut milk to it and let it come to a boil and reduce a little.
Add the semi thick coconut milk and let it boil for a few minutes
Add the thick coconut milk, cardamom powder and when it boils, take from fire.
In a kadai, heat 1 tbsp ghee and fry the cashewnuts till slightly brown.
Pour this over the prepared Payasam.
Serve it warm or cold.


3.3.12

Baked Medu Vada/Uzhunnu Vada/Urad Dal Vada


Ive soaked Urad dal today to make Medu Vadas  in the evening. Well, today I will be making the fried version and suddenly I remembered I have the baked version somewhere in my draft. The pics are not perfect coz I wasnt planning to blog it (psst psst, I took these pics on my mobile fone). Well, you cannot compare the baked version to the fried one. The fried one tastes better any time but this DOES come close plus the added benefit of guilt free snacking- coz u must be knowing that the fried medu vadas absorbs a LOT of oil. And in case, you want to take a look at the Fried version, here is the recipe. But still, I have to tell you when I baked it last time, it was over in 15 minutes..My kids absolutely loved it. So maybe they didnt realize it was baked...or maybe didnt mind the fact that it was baked.. :) whatever...!!!!

Urud Dal: 2 cups
Shallots Chopped: a handful (8-10)
Ginger: 1 tsp minced
Green Chillies: 2 chopped
Pepper: 5 crushed
Curry leaves: 1 sprig
Salt: as needed
Oil: 3 tbsp
Soda Bi carbonate: 1 tsp
Baking Powder: 1 tsp

Soak the Urud Dal in water for 5-6  hours.
Grind it without adding water.
Preheat oven to 300C or the maximum temp on your Oven
Pulse the shallots, ginger, curryleaves, pepper and green chillies just once and add to the urud dal batter.
Add required salt and mix well.
Add the oil, baking powder and soda Bi-Carbonate and mix it well, try beating it to get the dough aerated well.
Coat your baking tin with non stick spray
Wet your palms, scoop a ball from the batter, flatten it and make a hole in the centre.
Place it on the tray, 1 inch apart
Cook till done. (it took around 20 minutes in my oven but oven temperatures vary, so keep an eye
Serve warm.


2.3.12

Brinjal saute (Chinese)


Brinjal Manchurian is something my mom-in-law makes often. Well, this is not that exactly coz Ive not batter fried the Brinjal. This is a healthy variation of the batter fried version.

Brinjal : 5 quartered (the small variety)
Fresh Red/Green Chillies; 2 chopped
Garlic: 4 cloves chopped
Ginger: 1 tsp chopped
Onion: 1/4 cup diced
Oil: 3 tbsp
Salt: as required

Soya Sauce: 1tsp
Tomato Sauce: 1tbsp
Chilly sauce: 1 tbsp
Cornflour: 1 tbsp
Cold Water: 1/4 cup


Mix the corn flour in the cold water and add all the sauces and keep aside.
Heat oil in a kadai and add the brinjal and fry for a few seconds.
Now add the onion, chilly, garlic and ginger and saute for a few minutes.
Add the cornflour mixed sauces and stir everything.
Serve warm with Fried rice or Noodles.


1.3.12

Chocolate Caramel Tart


I love tarts. Well, who doesn't??  This is a variation of the caramel cashew tart (a bookmarked recipe from A Tasty Challenge) I had posted earlier. This has my favourite caramel and chocolate too...

For the tart:

Maida: 2 cups
Butter: 1/2 cup
Egg: 1
Sugar:1/4 cup
Baking Powder 1/4 tsp
Salt 1/4 tsp
Cold Water: a little to make the dough (maybe about 5 tbsp)

Preheat oven to 200C
Sift the baking powder, flour and salt
Cream butter and sugar and add the egg yolk and combine well.
Add the flour and water and knead into a stiff dough
Roll out the dough and using a cookie cutter, make 15-16 round discs
Line them in a muffin pan and prick the dough with a fork to prevent the tart from raising.
Bake in the oven for 15 minutes.
Take out and cool completely.

For the Caramel filling:

Sugar: 1/2 cup
Water: 2 tbsp
Salt: a pinch
Fresh Cream: 1/3 cup or a small tub


Heat Sugar, salt and water on low heat till it is golden brown in colour. Make sure you don't stir while making the caramel, leave it like that or you can just swirl the pan
When it is golden brown, turn off the stove and add the fresh cream and mix well.
Let it cool slightly.

For the Chocolate Topping:

Cooking Chocolate: 100 gms
Fresh cream: 100 gms

Chop the chocolate and keep aside.
Bring the fresh cream to a boil.
Immediately remove from fire and add the chopped chocolate and mix well.


Now take the tart and place the caramel filling in it with the help of a spoon.
Let it set (around half an hour)
Now apply the chocolate topping on top of the caramel.
Enjoy!!!!